This page is dedicated to the construction and buildup of my 1:50 scale OTW Designs Victoria / Upholder Submarine kit.
The kit was purchased from a local modeller who had run out of room to build up this new kit. Completed, it should be over 55" in length.
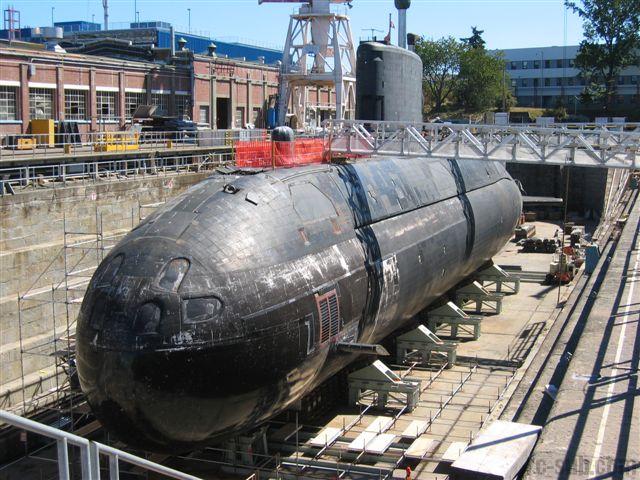
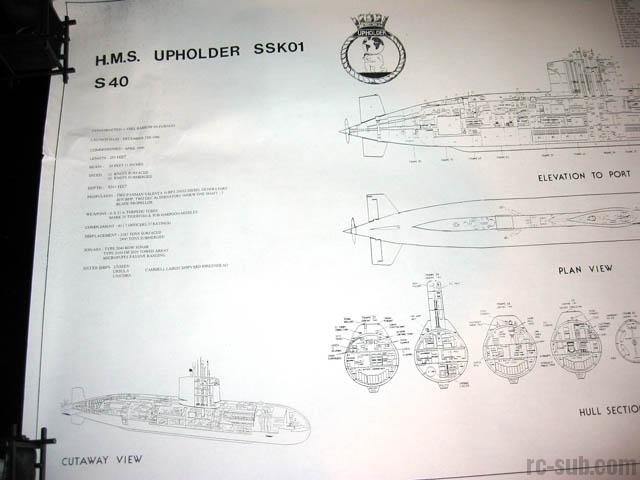
Some Quick Stats on the Victoria:
Displacement: 2,160 / 2,400 tons surfaced / submerged
Dimensions: 70.3 x 7.6 x 6.5 meters (230.6 x 24.9 x 21.3 feet)
Power: Diesel-electric; 2 Paxman Valenta 1600 RPA SZ diesels
Propulsion: 1 GEC motor, 5400 shp;
Propeller: 1 seven blade cavitation free design
Speed: 12 knots surface, 20 knots submerged
Range: 8,000 miles at 8 knots (snorting), 90 hours at 3 knots (batteries)
Depth: 200 meters (656 feet)
Crew: 41 men, 7 Officers (plus 5 training)
Acoustical tiles: 22,000
Armament: Six forward 21" tubes for 18 Gould Mk.48 Mod 4 torpedos
HMCS VICTORIA was originally intended for use with the British Navy. For Canada, the introduction of the Victoria l provides a permanent submarine presence on the West Coast for the first time in more than 30 years. Three more submarines will be delivered to Canada and will be based in Halifax. The submarines will conduct surveillance patrols, guarding Canada's coastal waters against drug-smugglers, illegal fishing and polluters, and will contribute to international military commitments.
March 1, 2006
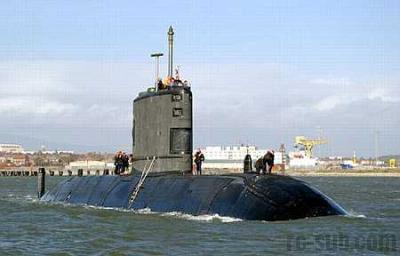
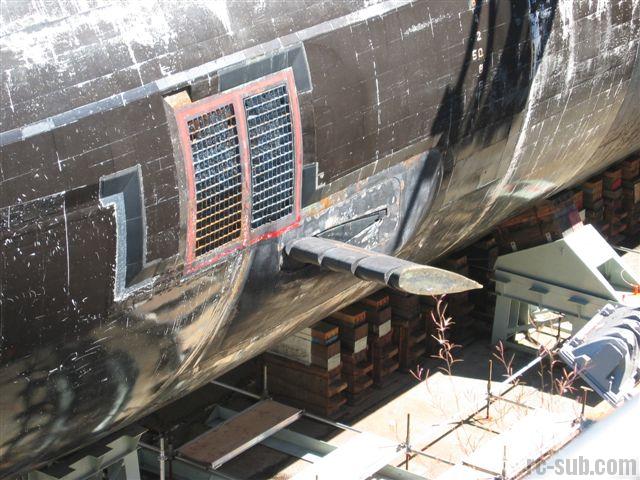
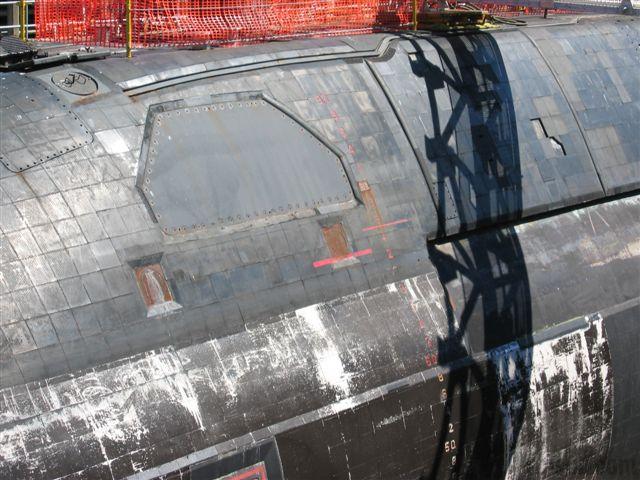
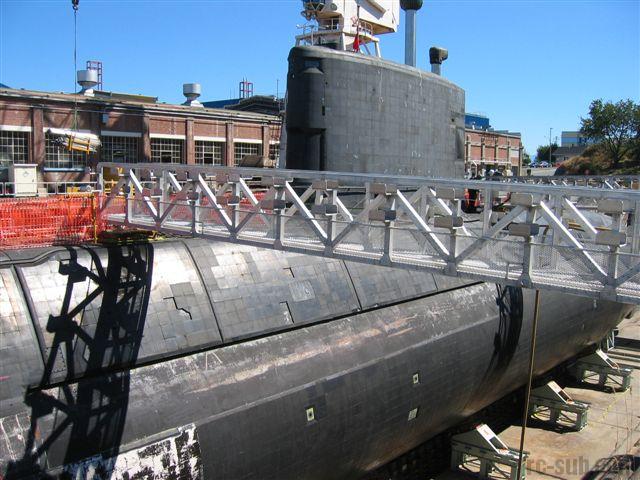
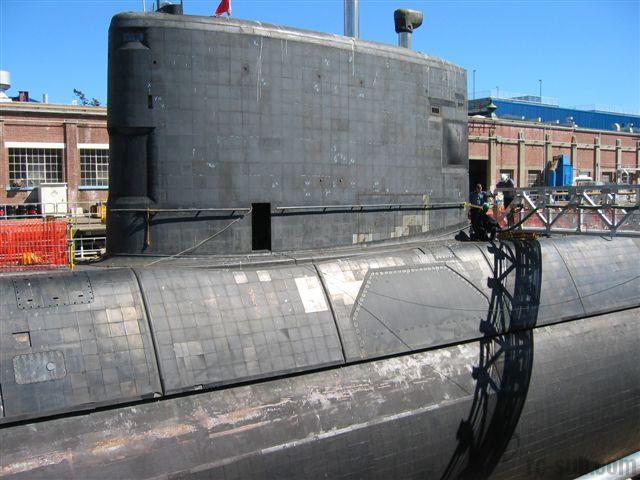
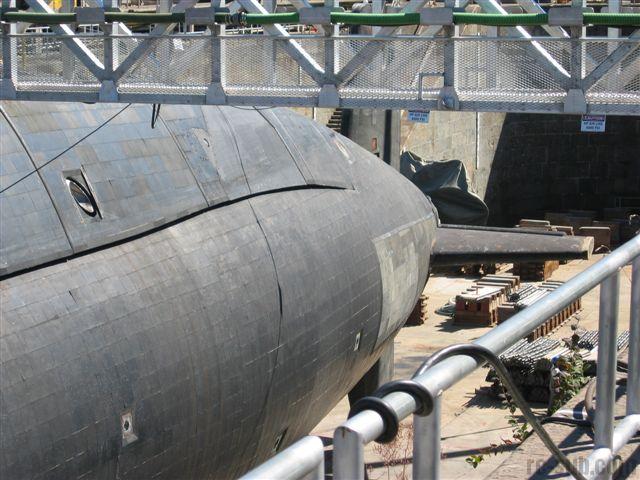
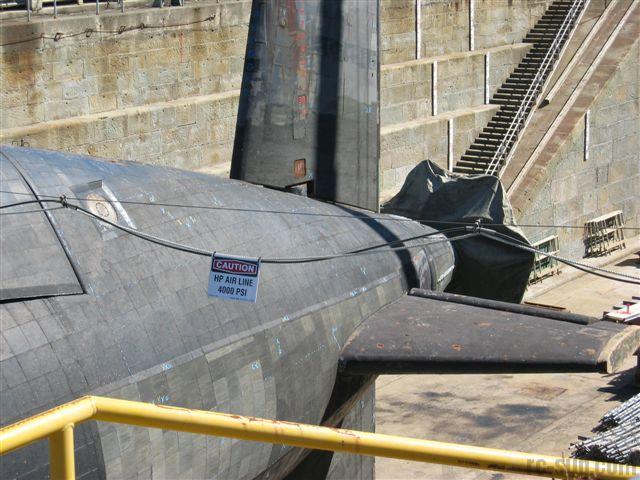
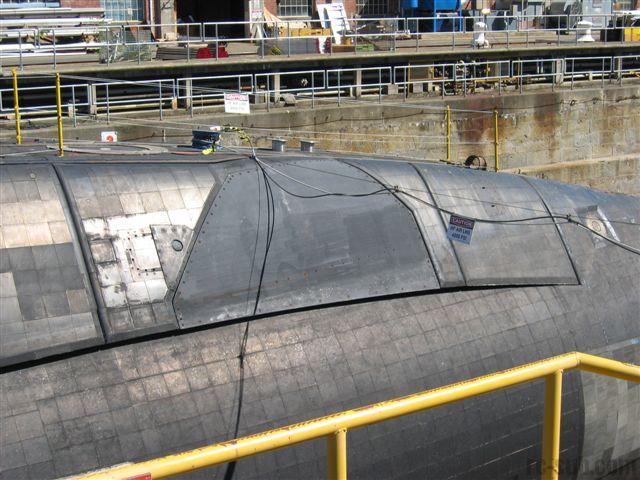
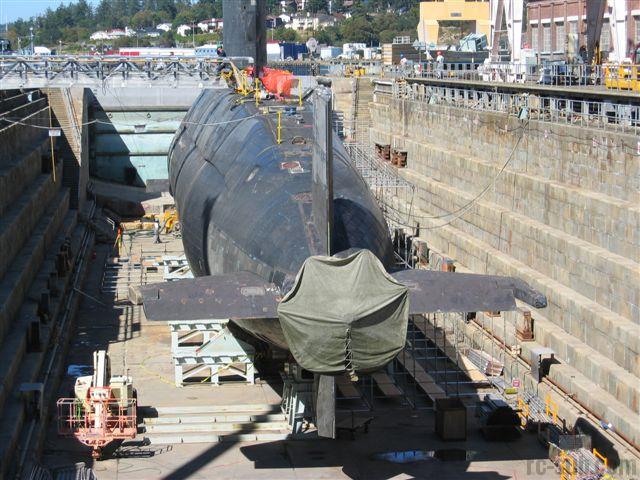
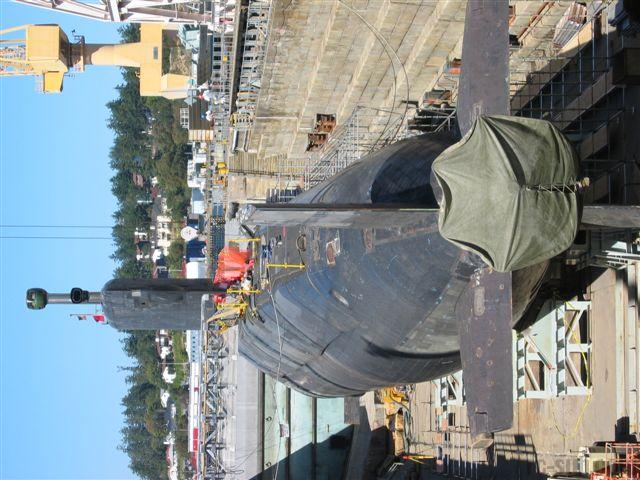
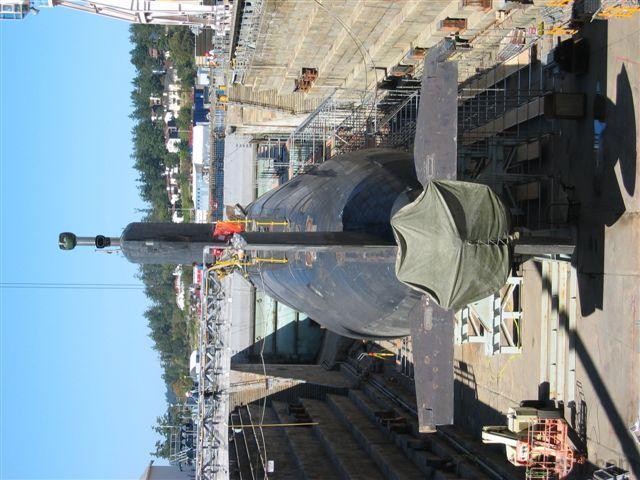
These photos were actually taken by me at the CFB Esquimalt Military base in Victoria, BC, Canada. I was fortunate enough that the gentleman that I got my kit from worked there and managed to get me in for a tour of the boat as she was undergoing refit right after her purchase from the UK.
The subject of the photo is the Victoria herself!


March 8, 2006
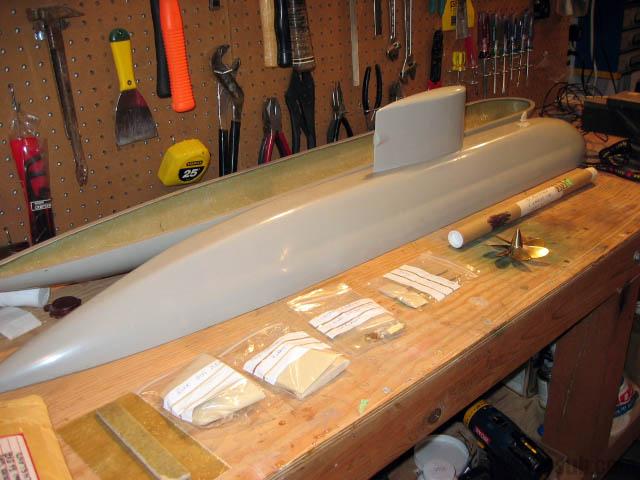
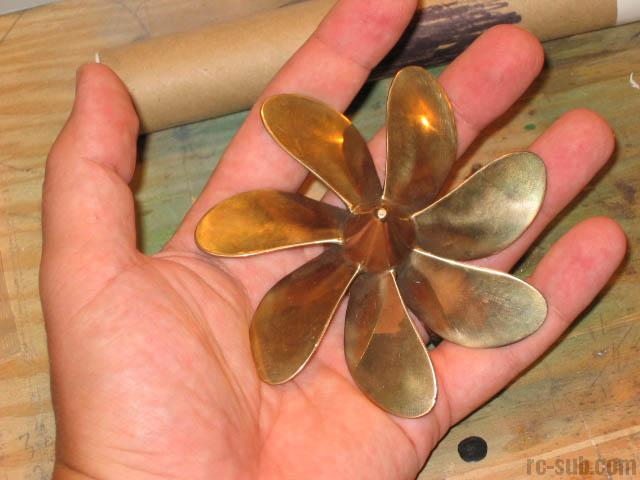
Included with my kit is all of the drive hardware, fittings, and linkages for the kit. Also included is a superb brass propeller, which you can see in the above pictures.
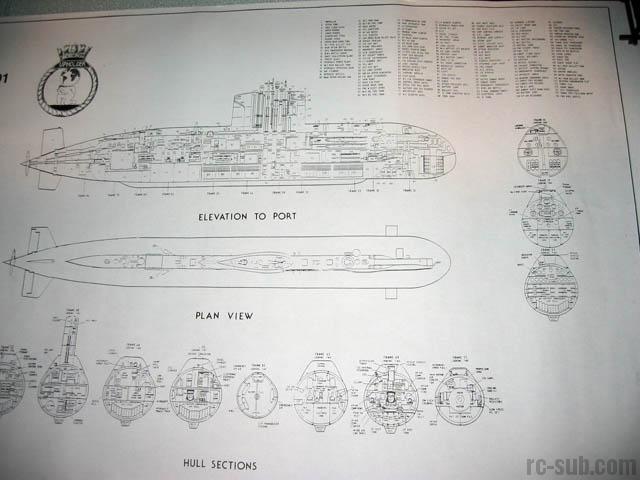
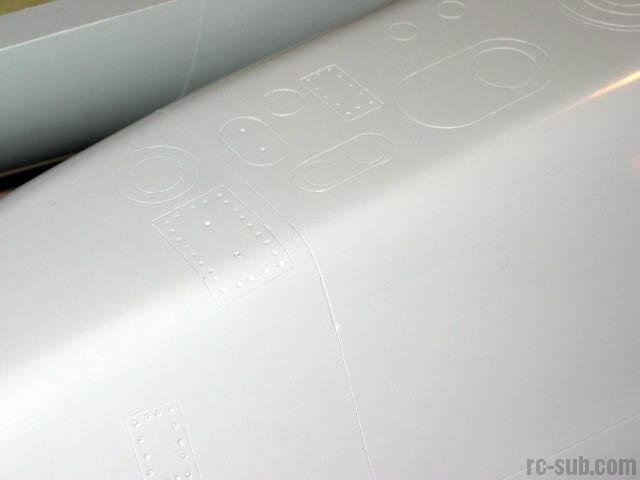
The kit itself is of superb quality, sharply scribed, and perfectly matching with each piece fitting together well. I have also gotten assembly drawings for the actual Upholder submarine from the gentleman who sold me the kit!


March 20, 2006
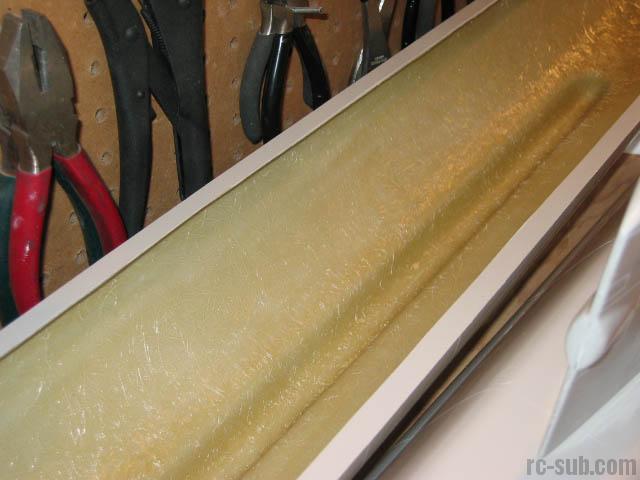
Progress has continued well on this model. I got access to my new shop about three weeks ago, and since then I have begun working on this model in earnest (let's say from the beginning of March).
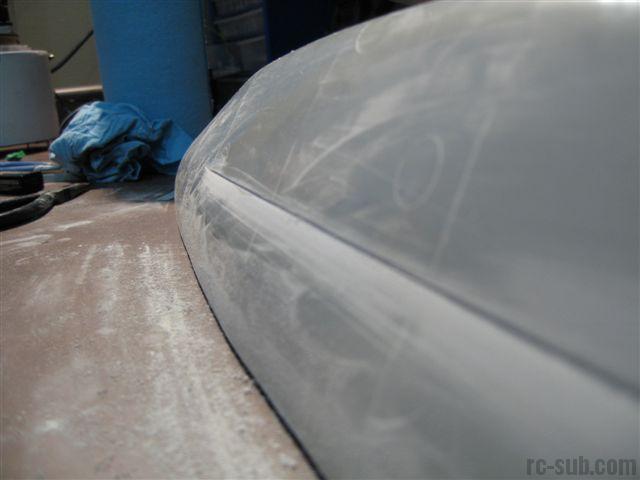
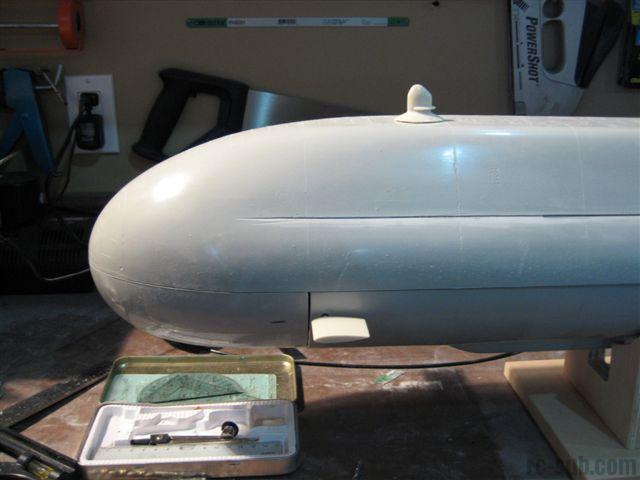
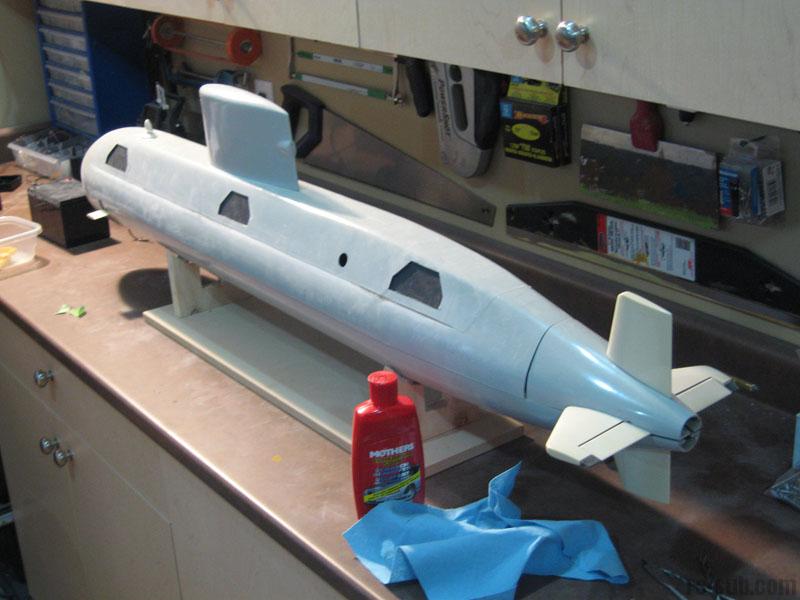
I began by deepening the longitudinal scribe lines in the hull which were supposed to depict the demarkation of the hull and fiberglass deck of the actual sub. The hull, as shipped, has a simple thin line. I wanted something far more realistic and separate looking. I began by running a small piece of hacksaw blade along the line (very carefully) until I had chewed into the gelcoat to the point where the blade was not so prone to slipping. After that, I angled the blade to the proper pitch (upwards and along the hull circumference). I then deepened the line until I'd cut almost through the entire thickness of the hull. From there, I used sandpaper on a piece of wooden paint stick dowelling to sand the lower edge until it was faired into the hull. The result? A nice, realistic demarkation between pressure hull and deck!
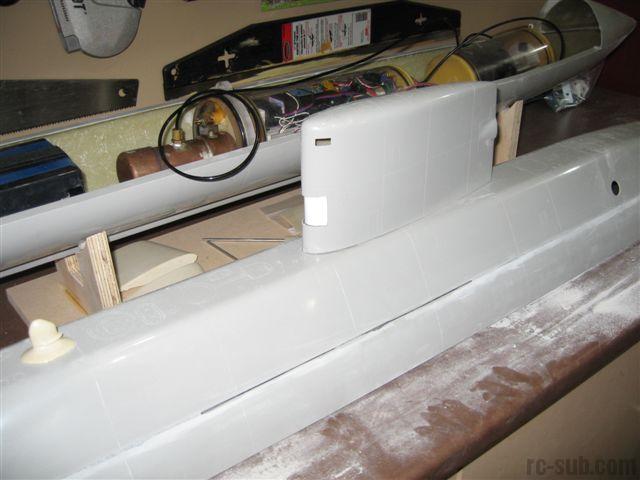
After that, I cut the forward section of hull from the lower hull, and the stern section from the upper. I will later bond each piece to their opposite mate to create a "Z-cut" hull. This should preserve the details along the front of the sub, and along the lower stern section once it is complete. Next, I laid out the interior components to see how they would sit.
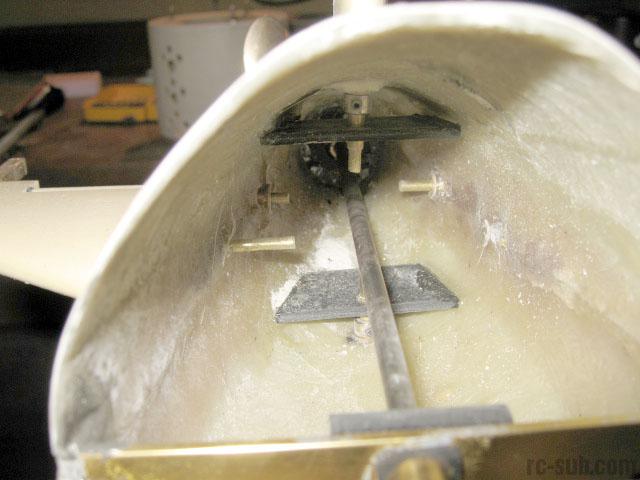
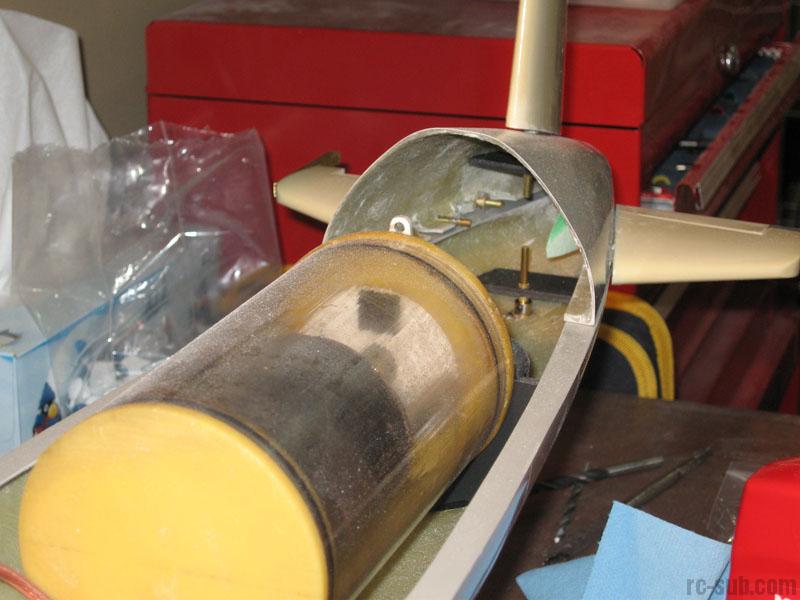
From there, I proceeded to work on the forward dive planes. They are connected with a single shaft just forward of the main drive battery. I mounted several pieces of the internals to the hull. In one of the pictures below, you can see a styrofoam blank that I created for the ballast tank. Since then, I located some 4.5" diameter plastic storm drain pipe that is close enough that it will work in my application and save me the hassle of having to build my own tank.
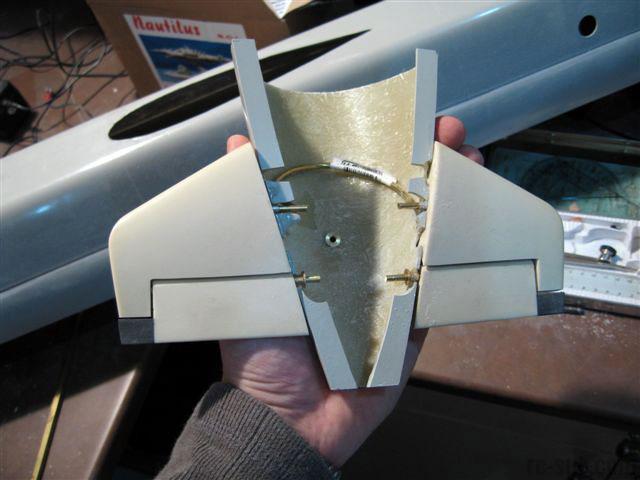
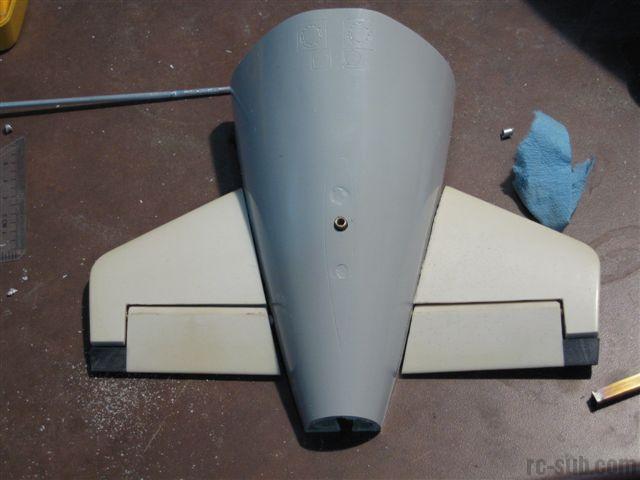
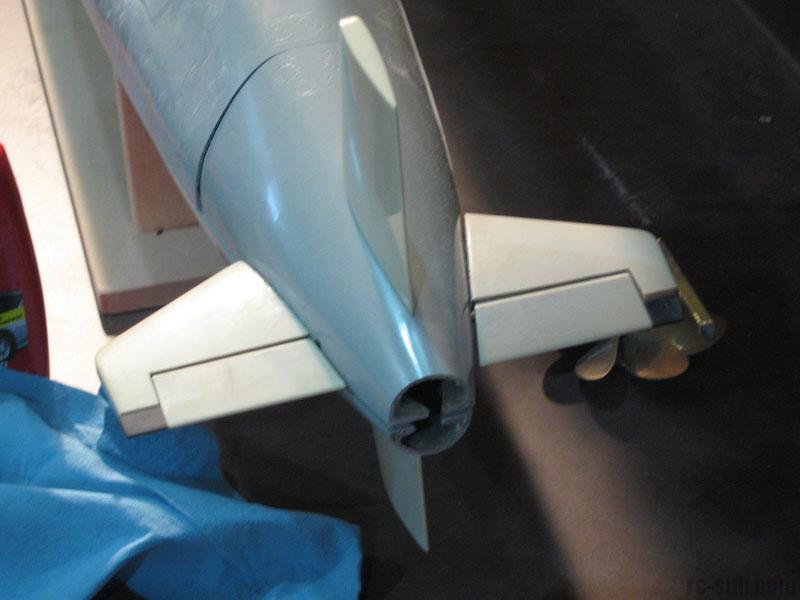
I then concentrated on the rear planes and linkages. The solid rear planes were cut at the scribed lines. The leading edges of the planes themselves were rounded with by bench sander, and the accepting edge of the plane housings were also rounded with my Dremel. The result is a smooth finish reminiscent of the original.
Each of the two planes were connected with a length of brass rods to ensure alignment while the glue set up. I'll simply leave this alignment brass inside when the model is buttoned up. Plans at this point are to run two separate linkages forwards to a single shaft that the servo will actuate, leaving the center of the hull clear for the drive shaft.

March 24, 2006
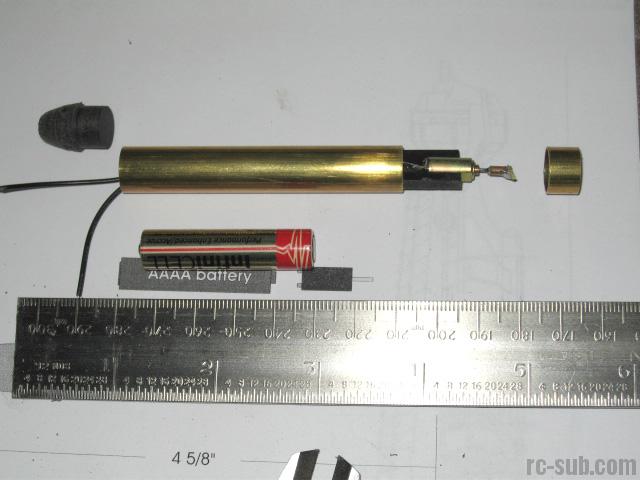
I've knocked out the six sections of the hull that represent the fiberglass covers on the sides of the sub hull this morning. I also got the chance to play with an electric torpedo design. It's very crude right now, but I have high hopes that it will prove to be a quick and fairly inexpensive system when completed. Below is a picture of the torpedo as it sits right now. The motor will run wet.
May 1, 2006
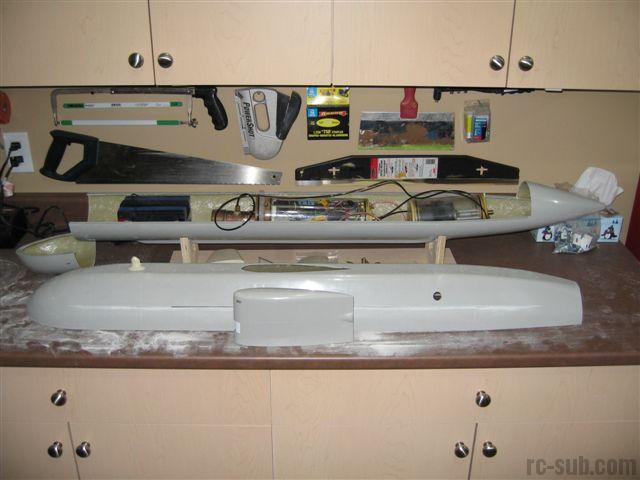
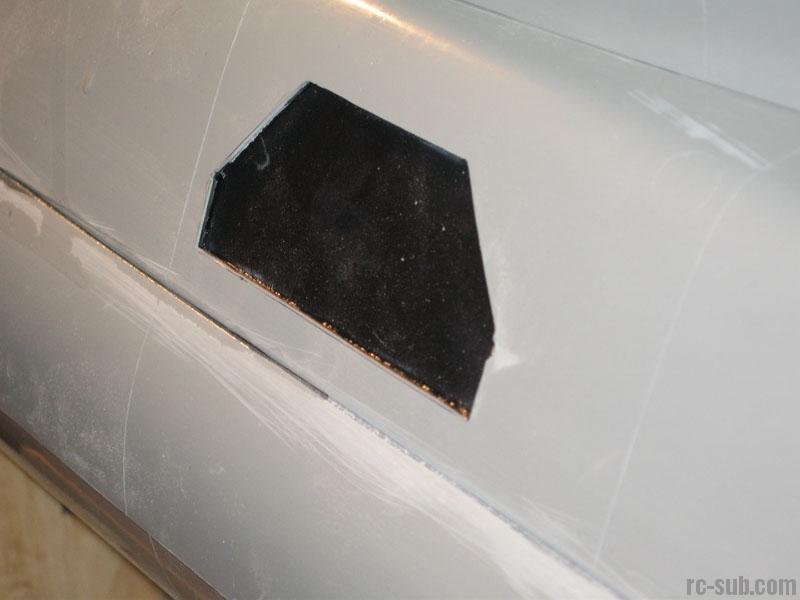
I've gotten a little bit further along. I've installed the sonar windows in the model, a detail lacking in the hull as it is shipped. I've also mounted the rudders and aft planes, along with the forward planes. Next step is glassing in the WTC mounts and reinforcing the joints and seams throughout with glass and matte.
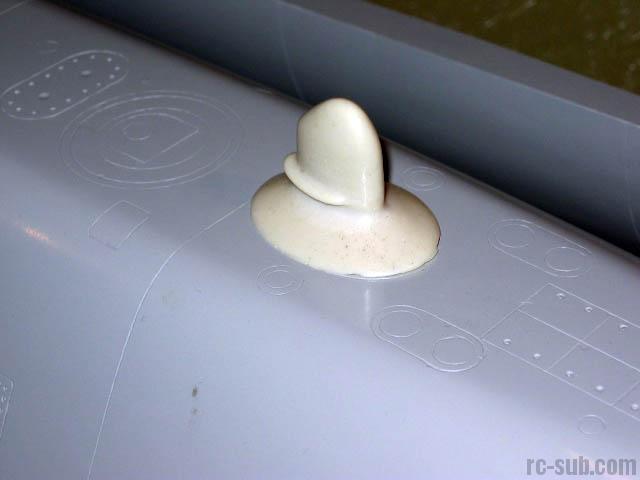
I also built the towed array housing on the portside dive plane. Should look pretty good when I'm all done and prime it up.


September 5, 2006
I've gotten further on the sub, and you can see that I've got all of the internals placed, the prop mounted, hull fiberglassed, and I'm currently working on the new ballast tank. The tank is about 4" in diameter and about 9" long. I'm looking to displace around 4lbs of weight, according to my calculations of the upper hull's weight.